How to disable Windows Defender in Windows 11?
For what need to disable Windows Defender?
Once you complete the steps, the antivirus will disable the real-time protection, which it’ll allow you to install apps or make a specific system change that you couldn’t before because the security feature was blocking the action. It is needed for unzip and install activator for activate your Windows or Office.
Disable Windows Defender in Windows 11
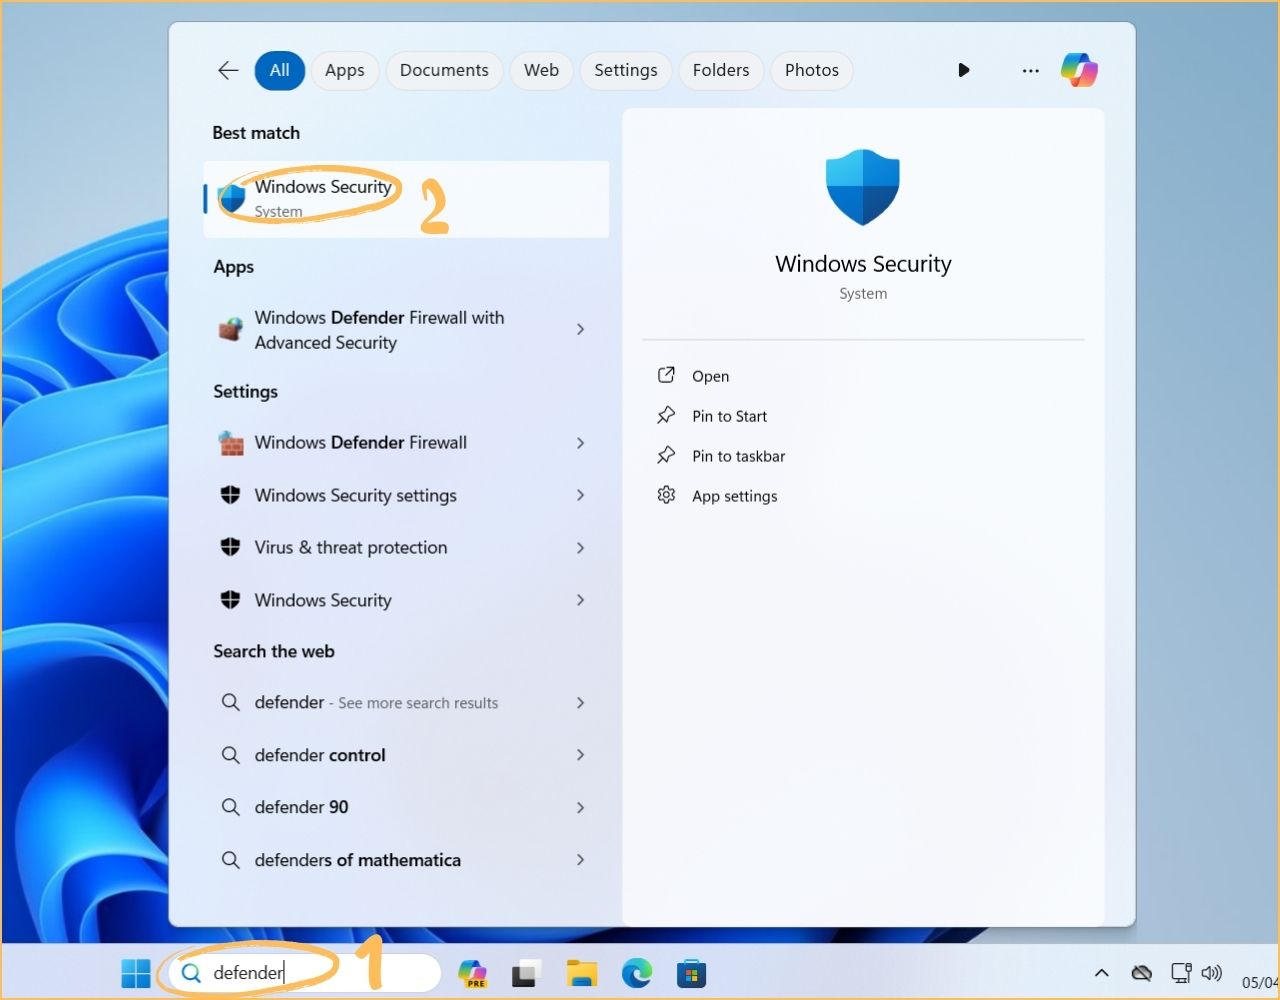
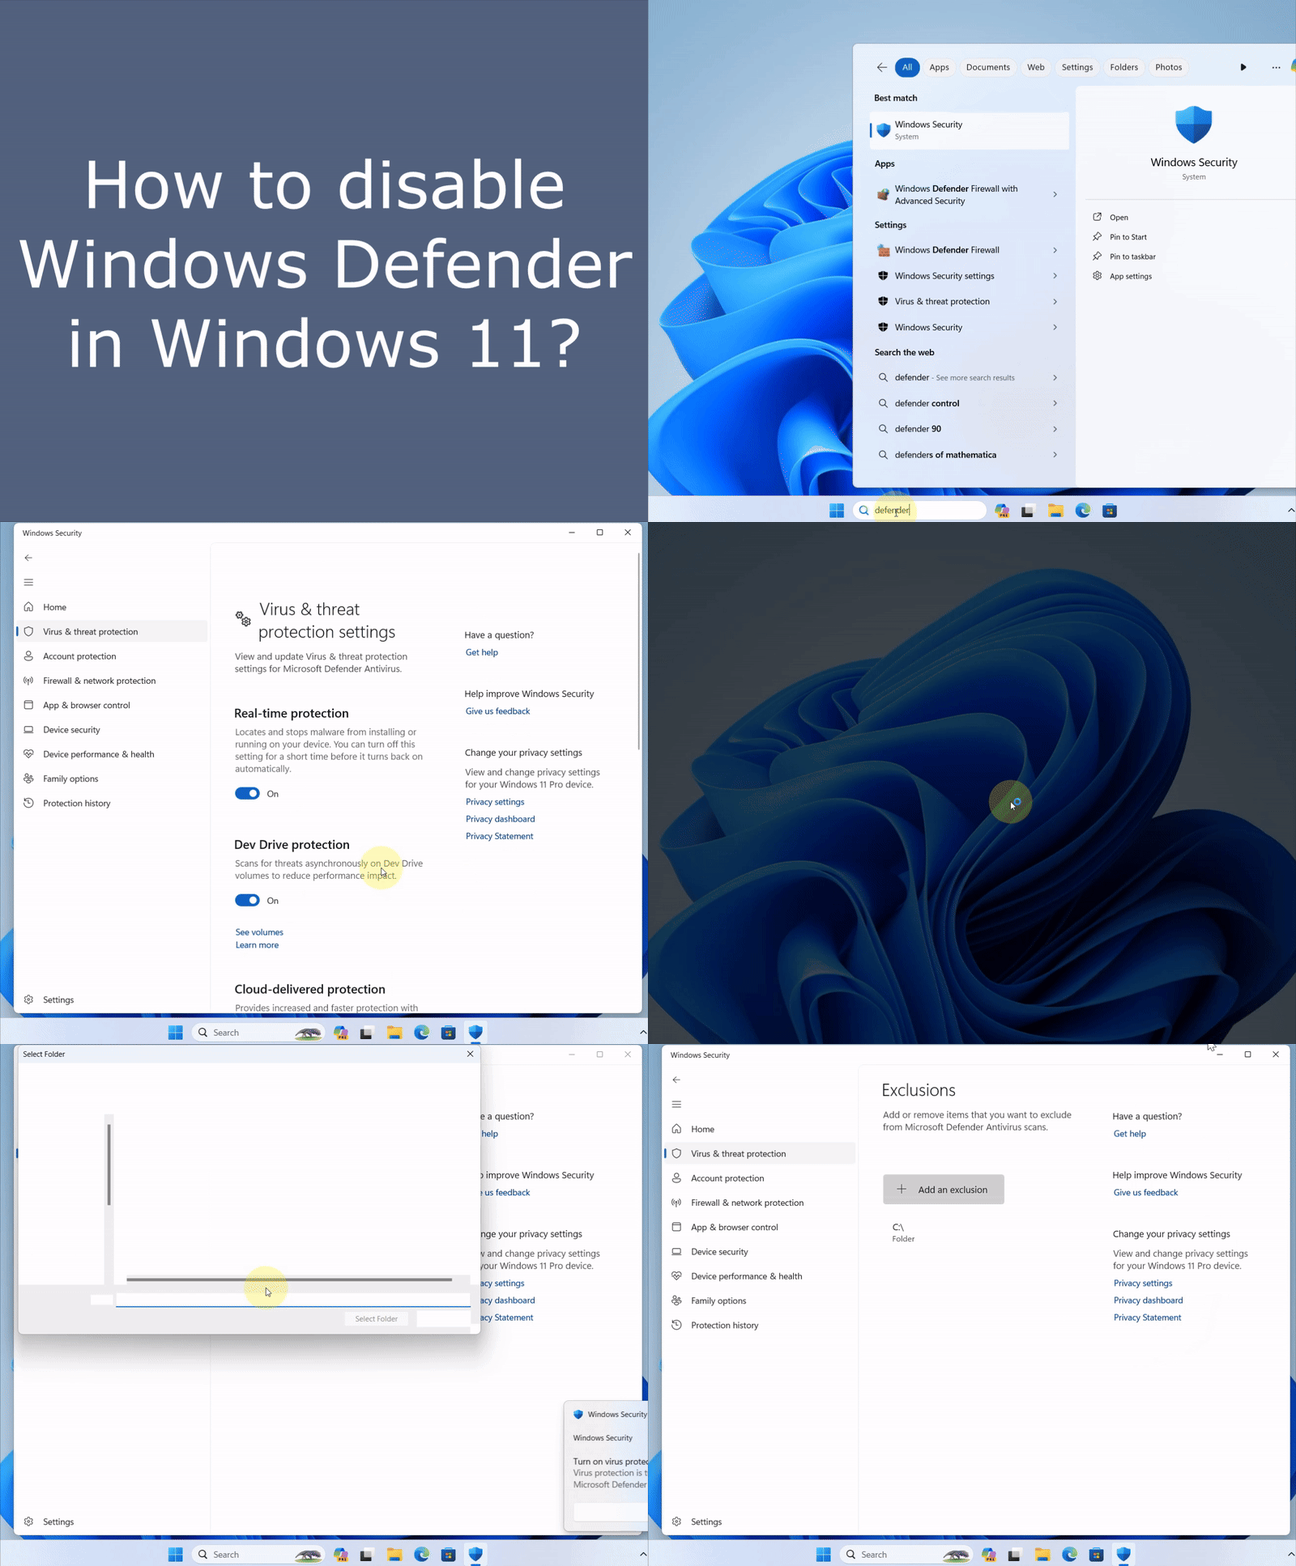
- To disable Windows Defender, you need to Type the following: defender (1) on the search. Select Windows Security (2).
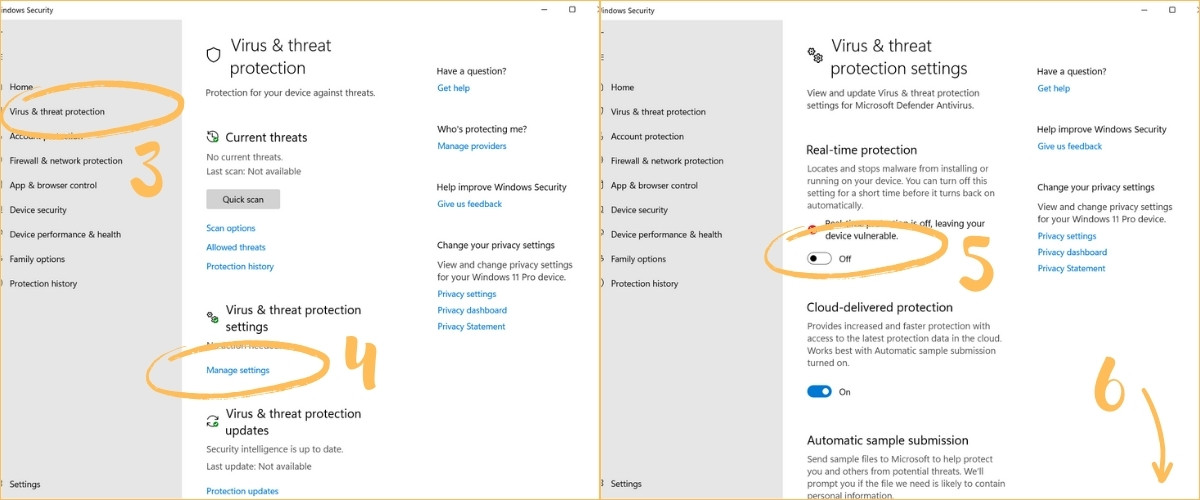
- Go to the “Virus & threat protection” tab (3). Press “Manage Settings” (4).
- Unclick Real-time protection (5).
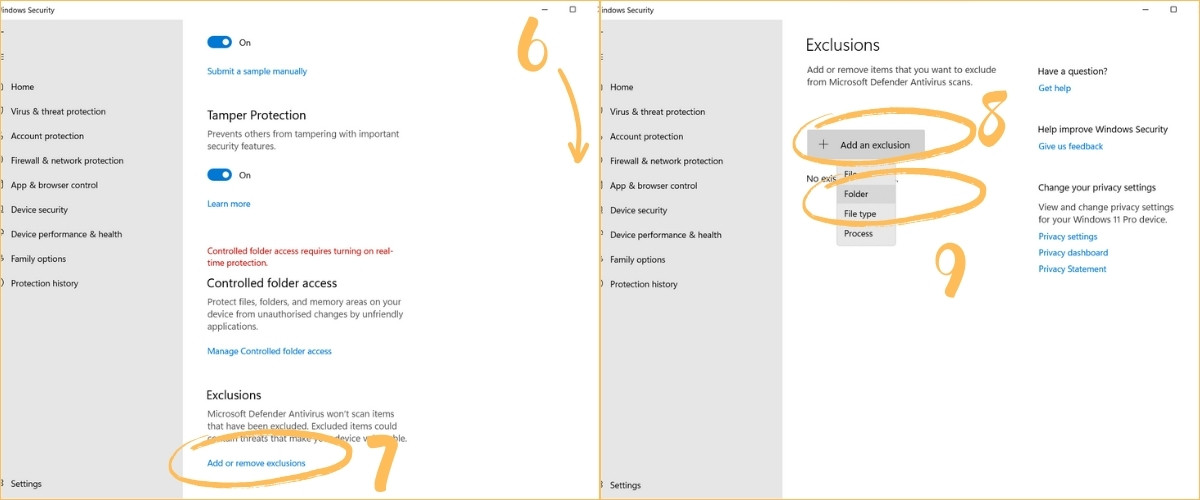
- Scroll down in the same window (6), press “Add or remove exclusions” (7).
- Add an exclusion (8)>Folder (9).
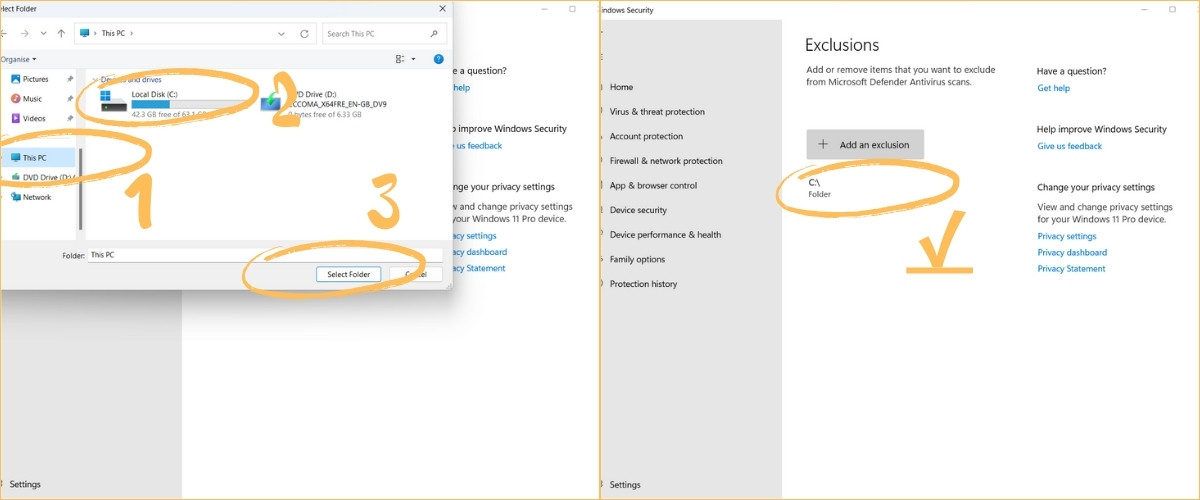
- Select This PC>Local Disk (C:).
- When Windows Defender protection is off, you can download and open any activator.
Conclusion
Congratulation. now you have disabled Windows Defender (Windows Security) and now you can safely activate your Microsoft Office with any activator from our site. After success activation you can turn on Windows Defender if you want, by clicking “On” button on the Real-time protection field and deleting Exclusions. If you did not understand something – please watch video tutorial below.
Video tutorial
Sharing is Caring: Please Share With Friends And Family
